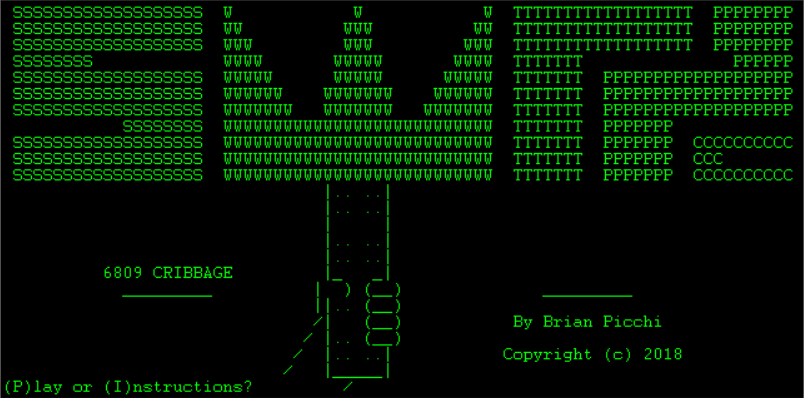
6809 Cribbage (2018)
Language(s): C, 6809 Assembly, PL/9
Text Editor: Notepad
Summary: After picking up a SWTPC 6809 S/09, I thought it would be cool to write something fun to play on it. Of course, this had to be something that would be displayed in ASCII characters only. Initially, I planned on porting an arcade-style game called Drelbs to it, but being brand new to the FLEX Operating System and the 6809 CPU, I decided to go for what I felt would be an easier point of entry… a card game.
I have always loved Cribbage and I didn’t see any versions out there for FLEX, so I decided to build one completely from scratch. For those unfamiliar with the name, it is a 400+ year old card game involving a physical board (the Cribbage board) that players use to indicate their position with pegs. You move along “streets” until one of the players reaches the 121st hole and wins the game. Players rack up points through runs, pairs, and flushes like poker, but also by having sums of 15 (and sometimes 31). In the end, it proved to be a great way to really get to know that system. Ironically, it took much longer to write then the arcade game I did later due to the complex AI logic needed to make a formidable opponent.
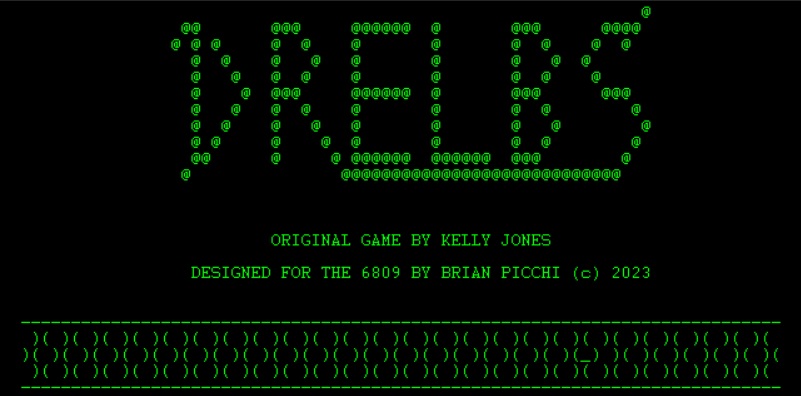
You can download the game here.Drelbs (2023)

Language(s): PL/9
Text Editor: Notepad++
Summary: For my second game, I wanted to revisit porting Drelbs to the 6809 because the game is largely made up of lines anyways, so I figured it would translate well to a text-only terminal. The object of this game is to form squares while running from the guards and tanks. Once all possible squares are made, a portal opens that sends you to a corridor where you free your fellow Drelbs from their captors.
This was a lot of fun to write and the play field turned out even better than I expected with the grid and characters fitting on the screen perfectly. Animating a rotating line is easy with hyphens, pipe characters, and slashes. I wrote the entire program in PL\9 using Michael Evenson’s updated emulator that now supports CPU speed controls. The game should run at 1Mhz (or 2Mhz for those daring enough) and requires about 40K of RAM.
Download it here.Development Notes for Cribbage and Drelbs:
Let’s start with Cribbage:
To start the project, I drew out most of the ASCII art and overall layout in Notepad and read up on some 6809 Assembly Programming literature. It had been several years since I had done any programming, so there was also a little freshening up to do on C and 6502, since the latter is similar to 6809. I ended up writing the entire game engine in C and used a fantastic compiler called INTROL C to compile my files and produce the executable program. There was another C compiler called MCCOSH, which was also very capable and even allowed for inline assembly code. It is a bit more particular with naming conventions and the number of characters per line and such, so I stuck with the former.
The INTROL C software package includes a C Compiler, Relocating Assembler, Linker and the Loader. There are dozens of different specifier commands that can be performed. I took advantage of some of them such as retaining the intermediate assembly file and displaying the different Compilation phases. So I would load a portion of my C code, then enter the command ICC FILENAME1.TXT -R which produces an assembly file (.M09) and a relocatable file (.R) later to be linked with other parts of my game after it has been updated. The command to link multiple files is ILINK FILENAME1 FILENAME2 FILENAME3 which produces the executable .CMD file. The “-R” specifier is optional, but it retains the intermediate assembly file (.M09). That allowed me to insert additional 6809 instructions for some of the more advanced code I required.
I did observe some strange quirks with INTROL C. Make sure to remember that any duplicate routines in your files will be counted each time and use up memory. The solution is to simply import those routines into the secondary files rather than declaring them. Duplicate variables are fine as it detects those when ILINKing the files. Next, be careful with array tables. Although it only happened a couple times, I would occasionally have to create additional variable space in my array tables because the early bits would get overrode with other values. So I would declare it as maybe “int cardhistory[10]” even though only 2-10 were actually used. Also, I had to literally change the location where some of my variables were located because the system would get confused and store a different variable’s value in it. Lastly, if you intend to write multiple programs that will eventually be linked together and saved as one program, then make sure you have some space between the Introl C program and those others. About 200-300 bytes or so should do the trick.
I had a vision for some cool animations in the game, but soon realized it would be kind of tricky using C. The thing with C is it has no concept of a cursor on a terminal. I would need to add the Curses library and it would be kind of overkill for what I needed. Some folks in the FLEX User Group suggested I check out PL/9, so I downloaded that and quickly fell in love! PL/9 is basically a variant of PL/M, a very early programming language designed by the late, great Gary Kildall in the early 70s. It is procedural just like C and pretty easy to learn. Best of all, it had libraries for X-Y cursor addressing! Both PL/9 and MACE (a 6809 Assembler and Editor) were written by Graham Trott.
So I ended up building all of the title screen animations and game instructions in PL/9 within about 7K. The size was originally much larger, but I was able to optimize it considerably. PL/9 works a bit different during the compilation phase versus other programs. Any unused functions that produce code will still be included in the final program and use up memory! I was able to cut the memory usage in half for the intro program by optimizing the IOSUBS.LIB and TERMSUBS.LIB files.
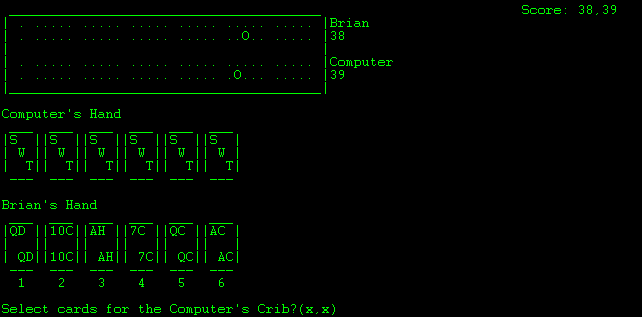
Little things you don’t think about actually take a little effort and strategy to look right on a terminal screen like displaying the card values correctly within the ASCII card art. If it is a number between 2 and 9, then you just display the decimal value. If it is a 10, then you have to adjust the placement slightly, so the card size doesn’t change. If it is a 1, 11, 12 or 13, then I had to display the ASCII value for the letter corresponding to those cards, so 65, 74, 81 and 75 using %c instead of %d. For the Cribbage board itself, I used an array for storing the peg positions. The array held 61 values in total since a single street has 30 positions and there are 2 streets in a round trip, plus the starting position. So the nice, little while loop looked something like:
i=1;
while(i<61){
if (score == i || score == i+60)
{
board[i] = 79;
}
Because the C code portion required around 32K of memory, I had to split it up into 3 modules and link them together. I made a customized header file with all of my variables shared by the different modules. INTROL C came with some header files like the stdio.h file, which contains standard variable and function definitions. So all three of my C files had #include statements at the top for the two header files I needed. After producing a single executable file, I used a utility called SLEUTH to get the Transfer address, so I could plug that into the PL/9 code. That way, it could jump over to the start of the actual game from the title screen.
While the core game was done in C, I did add some 6809 assembly code for the random number generator, cursor control changes for the score tracking and animated skunks and some other miscellaneous odds and ends. I adapted my random number generator from the one provided in PL/9. Of course, a RND generator is only as good as its initial seed. My seed for it is stored in “r” which is generated from a combination of timers and my own secret recipe. Here is a segment of my routine:
ldx 2,s (point to RNDVAL)
ldb _r (loop counter with r value)
loop lda 0,x (get MS byte)
asla
asla
asla
eora 0,x (EOR bit 28 with 31)
asla (put into carry)
rol 3,x
rol 2,x
rol 1,x
rol 0,x (rotate into RNDVAL)
decb (count off)
bne loop (repeat multiple times according to the value of r)
cmpa #1
ble loop
sta _r
I wanted to have a score tracking system display the current score at all times and remain in a static position on the screen during game play. Easier said than done using a terminal! I ended up writing that routine in PL/9, producing the executable BIN file, then using a disassembler to get the assembly code. Once that was done, I pasted in that routine into my existing assembly files produced by INTROL C. I had to make some changes to allow it to act as a routine, but after that it worked like a charm. With a few tweaks, I was also able to apply this chunk of code to other areas of the game, such as the ending sequence which features some dancing skunks!
I really enjoyed learning all the various utilities that people may have used back in the day to handle the same sort of things I needed. For instance, I would use a utility called “O” within FLEX to get the machine language equivalents of assembly code for troubleshooting or just making sure the values I expected to show up were fine. I would enter a command like O,1.TEST,ASMB,SCORE.TXT and that would create a file called TEST.TXT on drive 1 showing me a machine listing for the assembly code in the file SCORE.TXT.
MON is the command to exit FLEX and access the Monitor. G returns you to FLEX. I used it all the time, since I was constantly making sure certain values were populating at the right times. For instance, I used a counter in the intro to seed the random number generator. I could simply exit the program at the appropriate time and then enter the monitor to make sure the counter was passing the value properly to the main program. Similarly, when a player first initializes a new game, the Pause Control is inactivated at $CC09. This enables an auto-scroll feature that ensures all of the printed text is properly displayed without pagination. The program stores the current value before doing that and then reinstates that value when the user quits the game.
The majority of my development and testing was done using Michael Evenson’s wonderful 6800/6809 Emulator. I’m not sure what I would have done without it. I got so used to the lightning fast compiling times. You gotta love doing retro computing in the modern era.
One small challenge I came across was making the game play on any 80 x 24 terminal screen. Some terminals had cursor control, others did not. Those that did sometimes handled it differently than others. I ended up writing a very small program at the very start that asks the user if they want to play the game on terminals compatible with the cursor control code I used, such as the ADM-3A. If so, it jumps to the fancy title screen. Otherwise, it jumps directly to the game. The user’s answer also determines how the score will display and if the skunks appear after someone skunks their opponent. I also provided the option to save the answer response, so the computer will remember the settings going forward. So essentially, the game is divided into three programs: The terminal display, the title screen and the game itself.
All in all, this was a fun project. It did take much longer than I anticipated. This took over 100 hours to develop and was written in my free time over the course of several months. The vast majority of the effort was in perfecting the AI opponent. In fact, right when I thought I was done, I would find myself touching up the AI logic here and there just to make it that much more perfect. The overall look and feel was done relatively fast. I actually did a lot of the programming while on business trips, since that is when I got the most free time. The funnest part for me was probably writing the Computer AI. I wanted to make a very formidable opponent and I believe I succeeded. I did teach him everything he knows, after all. Building a game with no sound or graphics and making it look good and play well was also very satisfying.
I hope you enjoy the game as much as I did writing it. It requires 32K of RAM from location $0 to $7FFF, although about 42K is recommended ($A600) along with a terminal with cursor addressing facilities. All the great things you love about Cribbage are included, such as the unique slang and skunking. Also, there are lots of Easter Eggs. You can download it here.
Drelbs:
The initial proof of concept for an ASCII version of Drelbs was something I drew in Notepad back in 2019. I wanted to make sure it was even possible to fit the 68 grid lines that can form the 20+ squares from the original game on an 80×24 screen. On top of that, there still had to be room for the characters to move between the lines and on an outside perimeter. I also drew initial mock-ups of the characters, including the faces on the squares. I was pretty happy with the result, but I figured it would be quite the project and there was a lot going on at the time, so I put it on hold for a while.
Then, in early 2023, I decided the time was right to begin programming. The idea was for the entire game to be written in PL/9 since it already had logic for talking to terminals and supported inline assembly code. I only used PL/9 a little bit for Cribbage, mostly for the animated title section. Here, the entire program was going to be animated with arcade-style action, so it made sense to do that.
When using PL/9 compared to C, the iterative process of editing and compiling your source code is way simplified. In C, each file had to be compiled separately and produce intermediate assembly files. Those files were then edited, compiled, and linked together before doing one final compilation. In PL/9, you edit your source file and compile… done!
To load your source code, you used the command “L=filename”, then compile it with “A:O”. Other commands are available, but that’s all I needed. If there are any error messages, then it lists the line number for easy corrections.
PL/9 also has its own editor, but I ended up just using Notepad. The major limitation of doing that was working with line lengths up to only 127 characters long. This meant longer statements that would normally fit on a single line in the native editor had to be split across several statements. PL/9 uses just 16K, so there was plenty of memory remaining for you. However, if your program exceeds the allocated amount, then you can always split it up and just “include” one of your files in the other.
I recall the very first thing I coded was the plotting of all of the dots that would form the midpoint of the 68 grid lines. This was followed by the game’s outside border. The characters would be able to move left, right, up, and down, but when they move they have to commit to moving two paces, one per game cycle. This ensures they will always be aligned properly to either side of the lines midpoint, allowing the characters to push the lines to form squares. It also meant that it would be easy to increase the cadence of the guards and tanks as the levels progressed. Each character is 3 bytes long, so the hero looked like (o). This worked out well since the screen dimensions are about 3 times wider than they are high. Now, 3 bytes works well for the hero because he only has 1 eye, but the guards have 2. The only ASCII character that seemed logical for that was the quote symbol leading to this [“]. However, a quote is also used for the fprint command to indicate what to print to the screen, so I had to use putchar for that particular symbol. So in a way, I added a 4th character for the price of 3. Perfect!
Now the program was pretty faithful to the original design, but there were some compromises. In the original versions, the portal doors would move in a speed and direction that corresponds to the movement of the drelb. While I certainly could have implemented that, it seemed more work than necessary.
Also, the original design had the drelbs looking around and blinking every so often, but that idle effect would be very restricted using only 3 bytes of text characters, although I did implement the blinking in some parts of the game by switching between an o and – character.
I also had to make more compromises after all the squares are formed and the squares start turning into guard faces. When the number of faces was getting really high, the game’s performance was noticeably impacted because it was constantly updating a dozen facial expressions every 15 frames or so. After playing around with some different options, I ended up just having one fixed expression after the first handful of faces had formed and that worked out well.
On the flip side, I did add some new features to the game. Early in the development of the guard AI, I was testing their movement around the grid, making sure they could move lines, but not form squares. I hadn’t even added their sprites in yet, so it looked like a ghost was moving the pieces around. It was spooky and cool, so I thought that I should add a cheat code that lets the player activate a ghost mode where all the guards in both stages would be invisible. Only their line movements (and shadows in the corridor stage) would give them away.
The other thing I added was a better status section at the top of the screen. Now, you could know your score, round number, and your remaining lives at all times.
Since there is no sound in the game, I decided to add visual cues to let the player know when all squares had formed and when the hero dies. These were easy to implement and added some value to the experience.
Most of the program came easy, but there were definitely some tricky areas. The three most challenging pieces were as follows:
- The random appearance of guards in squares and how they behaved.
- The routine for identifying enclosed areas, so that an exit can form to free trapped characters.
- Determining when all possible squares have formed.
These things seem like they should be easy, but oh my goodness, they took weeks to finish. Granted, I was only working on this game in my spare time, but still. For figuring out enclosed spaces, I was initially going to use a brute force method where I would essentially have an invisible character try to enter each line in the area to check if there was an opening somewhere. However, I ended up writing specific logic for each type of shape that was possible to speed up that process. Like a rectangle that may be 4 squares long and 1 square high would be categorized as a horizontal rectangle. I also had logic for vertical rectangles and corner shapes. Initially, this routine was being run every game cycle, but I eventually figured out that running it once every 255 cycles was enough and improved performance a bit during segments with lots of action going on. Besides, it’s kind of fun seeing a character become trapped for a few seconds before being released.
Determining all possible squares was challenging because the exact number varies depending on each player’s own strategy, ranging from about 17 to 24. The basic logic is simple, though. I just check if any of the lines are connected to a square or if they are available. The challenge was accounting for situations like when open lines can form either 1 or 2 squares depending on how the player chooses to close them. Plus, making sure that things like portals and trapped guards are not counted as squares. It was one of those routines where as soon as you think that you’re done, another specific condition is discovered that needs to be accounted for.
The logic for determining when and how guard faces appear in squares turned out to be a long process, too. Randomly choosing the first square and having them appear was easy. It was figuring out how to reduce the number of squares and reassign their values after the square was gone that took some time. For a while, there would be faces appearing in random corners of the screen, completely outside of the squares. It was crazy. There was also making sure the guards only appear in squares where the conditions should permit it, like if it is already occupied.
I wanted the transition screens when traveling between dimensions (from the grid to the corridor) to be as close to the Apple II version as possible. It’s this psychedelic worm hole that opens with random snippets of bitmap graphics that quickly fill the screen, then the same effect happens on the left and right sides, and that whole process repeats 3 times. It is awesome! So to replicate this, I first borrowed a spiral effect used in a PL9 program called Spiral. In that program, the spiral is actually drawn from the outside-in, so I had to flip the logic to work the other way. That original code looked like this:
procedure spiral:
byte left,right,top,bottom;
left=0; right=79;
top=0; bottom=22;
clear;
repeat
y=top; x=left;
repeat
plot(‘1);
x=x+1;
until x>=right;
repeat
plot(‘2);
y=y+1;
until y>=bottom;
repeat
plot(‘3);
x=x-1;
until x<=left;
repeat
plot(‘4);
y=y-1;
until y<=top;
left=left+1; right=right-1;
top=top+1; bottom=bottom-1;
until top>bottom;
I obviously had to modify it quite a bit, but I was able to recycle most of the same routine for all of the spiral effects in the game, just altering the location variables and timing where needed.
Overall, this was a fun experience. The game is a favorite of mine for 8-bit computers and it felt rewarding to add a footnote to its legacy. Since it was done on the 6809, groundwork is set if anyone ever wants a Vectrex version, too!